Mount Filestore to use for the Google Kubernetes Engine clusters
Read and follow me on Medium (opens in a new tab)

Filestore
Filestore instances are fully managed file servers on Google Cloud that can be connected to Compute Engine VMs, GKE clusters, external datastores such as Google Cloud VMware Engine, and your on-premises machines.
As per the above definition, GCP Filestore can be simply cited as a Managed NFS file storage provided by GCP. Network File System (NFS) is a standard protocol that allows mounting a storage device as a local drive. In Kubernetes, we can use the NFS plugin to implement persistent volumes. For GKE, GCP has a Filestore CSI driver for this, but note that it only supports clusters that must use GKE version (opens in a new tab) 1.21 or later.
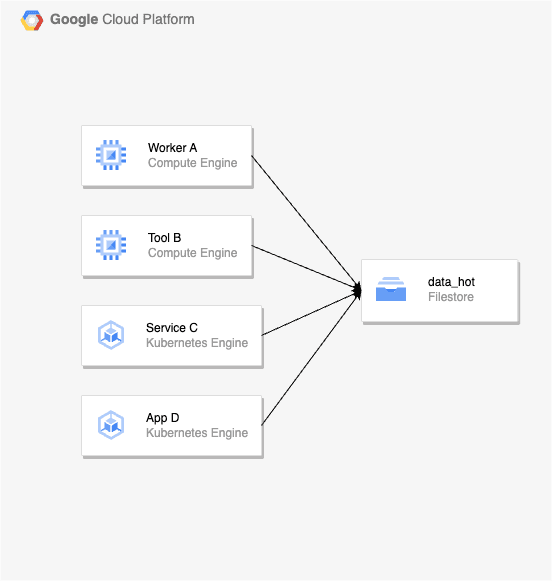
In my team’s case, Filestore is used to share data between VMs in both Dev and Prod environments. When we deploy the service to GKE, we want to load data (features and models) from disk to memory for serving without any additional database to act as an intermediary.
So, we want to take advantage of using the data from the Filestore to load directly into the memory, this makes it easy for us to change and debug quickly if there is a problem in the Prod environment.
Step By Step
1/ Check the existing Filestore instances. If you have not created a Filestore instance before and you want to create it throughStorageClass in GKE, you can refer to the details here (opens in a new tab). Since the Filestore install is already available, I will skip the creation step.
gcloud filestore instances describe data-science-data-hot-shared --zone=asia-southeast1-bOutput:
createTime: '2022-06-01T02:42:11.484303395Z'
fileShares:
- capacityGb: '1024'
  name: data_hot
name: projects/data-team/locations/asia-southeast1-b/instances/data-science-data-hot-shared
networks:
- connectMode: DIRECT_PEERING
  ipAddresses:
  - 12.34.567.89
  modes:
  - MODE_IPV4
  network: bigdata-vpc
  reservedIpRange: XX.XX.XXX.XX/XX
state: READY
tier: BASIC_HDD
2/ Enable the Filestore CSI driver (opens in a new tab) on the existing GKE cluster
gcloud container clusters update k8s_cluster \
   --update-addons=GcpFilestoreCsiDriver=ENABLED
3/ Mount existing Filestore instances using the Filestore CSI driver
- Create a manifest file like this, and name it
filestore-datahot.yaml
apiVersion: v1
kind: PersistentVolume
metadata:
  name: filestore-datahot-pv
  annotations:
    pv.kubernetes.io/provisioned-by: filestore.csi.storage.gke.io
spec:
  storageClassName: ""
  capacity:
    storage: 1Ti
  accessModes:
    - ReadWriteMany
  persistentVolumeReclaimPolicy: Retain
  volumeMode: Filesystem
  csi:
    driver: filestore.csi.storage.gke.io
    volumeHandle: "modeInstance/asia-southeast1-b/data-science-data-hot-shared/data_hot"
    volumeAttributes:
      ip: 12.34.567.89
      volume: data_hot
---
kind: PersistentVolumeClaim
apiVersion: v1
metadata:
  name: filestore-datahot-pvc
spec:
  accessModes:
    - ReadWriteMany
  storageClassName: ""
  volumeName: filestore-datahot-pv
  resources:
    requests:
storage: 1Ti- To create the
PersistentVolumeClaimandPersistentVolumeresources based on thefilestore-datahot.yamlthe manifest file (add-n <namespace>flag when running this command to make sure you create the PVC in the correct namespace you want), run the following command:
kubectl apply -f filestore-datahot.yaml -n demo- Before that, you can check the progress by monitoring your PV status by running the following command:
kubectl get pv -n demo- You should see the PV reach a
BOUNDstatus, when the volume provisioning completes.
NAME                                       CAPACITY   ACCESS MODES   RECLAIM POLICY   STATUS   CLAIM                                                                                                               STORAGECLASS   REASON   AGE
filestore-datahot-pv                       1Ti        RWX            Retain           Bound    demo/filestore-datahot-pvc                                                                                                                   1d
4/ Create a Deployment that consumes the volume
- Create a manifest file like this, and name it
filestore-example-deployment.yaml
apiVersion: apps/v1
kind: Deployment
metadata:
  name: reader
spec:
  replicas: 3
  selector:
    matchLabels:
      app: reader
  template:
    metadata:
      labels:
        app: reader
    spec:
      containers:
      - name: nginx
        image: nginx:stable-alpine
        ports:
        - containerPort: 80
        volumeMounts:
        - mountPath: /data_hot
          name: datahot
          readOnly: true
      volumes:
        - name: datahot
          persistentVolumeClaim:
claimName: filestore-datahot-pvc- To create a Deployment based on the
filestore-example-deployment.yamlthe manifest file, run the following command:
kubectl apply -f filestore-example-deployment.yaml -n demo- Confirm the Deployment was successfully created
kubectl get deployment -n demo- You should see the pod has a
Runningstatus, when the deployment completes.
NAME                      READY   STATUS    RESTARTS   AGE
reader-5c8d79dc7c-qzcdp   1/1     Running   0          2m
reader-744bc4f55d-lk5gq   1/1     Running   0          2m
reader-744bc4f55d-nf875   1/1     Running   0          2m
5/ Finally, you can use the command kubectl exec … to inspect, by executing commands inside containers.
kubectl exec -it reader-5c8d79dc7c-qzcdp --namespace demo --container nginx -- bash- Now you can run some commands like
lsorcdto check the data inside the Filestore instance.

Tips
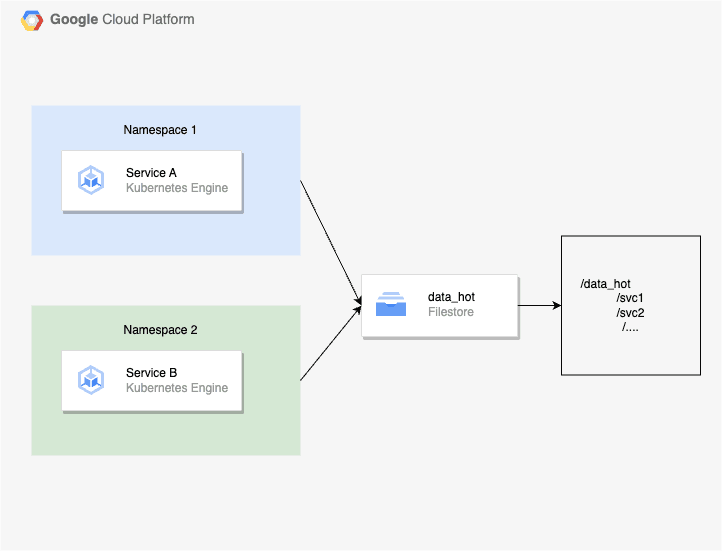
PersistentVolumes binds are exclusive, and since PersistentVolumeClaims are namespaced objects, mounting claims with “Many” modes (ROX, RWX) is only possible within one namespace (opens in a new tab).
So, If you want to use one Filestore instance(BASIC_HDD) for 2 namespaces, the simplest way is to create 2 PersistentVolume resources that point to this Filestore instance. Then create a corresponding PersistentVolumeClaim for each PersistentVolume for each namespace.

Troubleshoot
If you are using Istio (1.14.3) for the GKE cluster, and want to use Filestore in Deployment. You may have a situation where the Pod’s state will stay in Init status for a very long time with the event Unable to mount volumes…
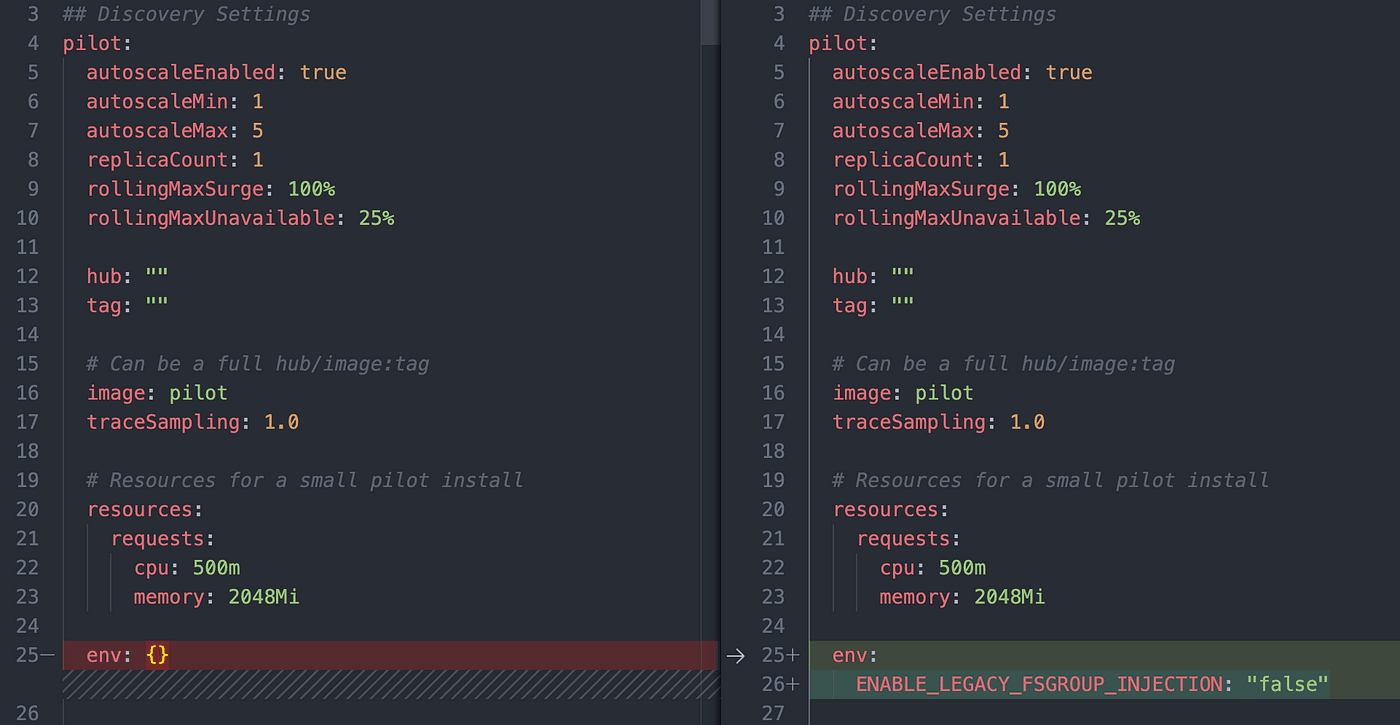
The reason is Istio injects a pod SecurityContext: fsGroup: 1337, and kubelet will use this fsGroup to configure your volume, which means do chomd and chown for any files in the volume. You can fix it with the following steps:
1/ Update file istio-1.14.3/manifests/charts/istio-control/istio-discovery/values.yaml
env:
  ENABLE_LEGACY_FSGROUP_INJECTION: "false"
2/ Run the following command:
helm upgrade istiod istio-1.14.3/manifests/charts/istio-control/istio-discovery - namespace istio-system - values istio-1.14.3/manifests/charts/istio-control/istio-discovery/values.yaml3/ Then, recreate the namespace with the label istio-injection=enabled and deploy.
Congratulations if you have successfully deployed.